Welcome to our page dedicated to inspiring your next DIY project using drill bits! Whether you’re a beginner or a seasoned DIY enthusiast, you’ll find a variety of creative ideas and detailed guides to help you transform ordinary materials into extraordinary creations. Let’s dive into the world of DIY projects with drill bits!
Custom Shelving Units
Build your own unique shelving units using wooden planks and a variety of drill bits. Our guide walks you through choosing the right bit for different wood types, ensuring sturdy and stylish shelving perfect for any room.

Creating custom shelving units is a rewarding DIY project that adds both functionality and a personal touch to any room. This comprehensive guide will walk you through the process, from selecting the right materials and drill bits to assembling and finishing your shelving unit.
#### Materials Needed:
– Wooden planks (choose your preferred type, like pine, oak, or plywood)
– Drill and a variety of drill bits (spade bits, twist bits, countersink bits)
– Screws and anchors (appropriate for the wall type)
– Sandpaper (various grits)
– Wood finish (paint, stain, or varnish)
– Level, tape measure, pencil
– Safety gear (gloves, goggles, mask)
#### Step 1: Design Your Shelving Unit
1. Measure the space where you plan to install the shelving.
2. Decide on the number of shelves and their dimensions.
3. Sketch a basic design, considering the weight they will hold.
#### Step 2: Choose the Right Wood
– For lightweight items: Consider pine or plywood.
– For heavy items: Opt for hardwoods like oak or maple.
#### Step 3: Selecting Drill Bits
– For pre-drilling holes: Use twist bits. Size depends on the screw diameter.
– For countersinking screws: Use a countersink bit for a flush finish.
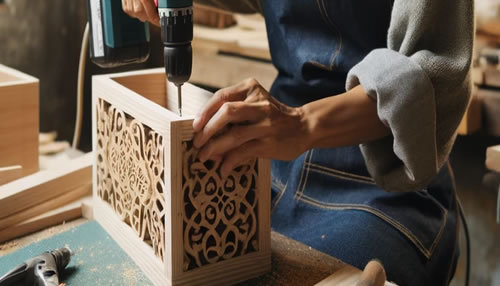
– For decorative purposes: Use specialty bits for intricate designs.
#### Step 4: Cutting the Wood
– Cut the wooden planks according to your measurements.
– Sand the edges for a smooth finish.
#### Step 5: Pre-Drilling and Assembling
1. Mark the drilling points on your planks using a pencil.
2. Pre-drill holes using the appropriate twist bit.
3. Countersink the holes if desired.
4. Assemble the shelves using screws, ensuring everything is level and aligned.
#### Step 6: Mounting the Shelving Unit
1. Locate studs in the wall for secure mounting (use a stud finder).
2. Mark the positions for the supports on the wall.
3. Drill holes in the wall for anchors, if necessary.
4. Secure the shelving unit to the wall with screws.
#### Step 7: Applying the Finish
– Sand the entire unit with fine-grit sandpaper.
– Apply your chosen finish (paint, stain, or varnish) evenly.
– Allow it to dry completely.
#### Tips for Success:
– Always wear safety gear while cutting and drilling.
– Double-check measurements before cutting and drilling.
– Choose screws and anchors suitable for the weight of the items you plan to place on the shelves.
– Consider the humidity and temperature of the room, as they can affect wood.
#### Final Thoughts:
Custom shelving units not only provide additional storage space but also add a personal touch to your décor. This project allows for creativity in both design and function, making it a perfect addition to any room. Happy building!
Handmade Wooden Planters
Create beautiful wooden planters for your garden or balcony. Our step-by-step tutorial makes it easy to select the appropriate drill bit for drainage holes and assembly, bringing a touch of nature to your space.

Building your own wooden planters is a fulfilling DIY project that enhances your garden or balcony with a touch of nature. This guide provides detailed steps on selecting the right materials, drill bits for drainage and assembly, and the process of building your planter.
#### Materials Needed:
– Wooden planks (like cedar, redwood, or pine, which are great for outdoor use)
– Drill and various drill bits (spade bits for drainage holes, twist bits for assembly)
– Wood screws
– Non-toxic wood sealer or paint
– Sandpaper (various grits)
– Ruler or tape measure, pencil
– Safety equipment (gloves, goggles)
#### Step 1: Design Your Planter
1. Decide the size and shape of your planter.
2. Sketch the design, including length, width, and depth.
#### Step 2: Selecting and Preparing the Wood
– Choose weather-resistant wood like cedar or redwood.
– Cut the wooden planks to the desired dimensions.
– Sand the edges for a smooth finish.
#### Step 3: Drilling Drainage Holes
– Select a spade bit (about ½ inch diameter) for drainage holes.
– Mark the positions for the holes at the bottom of the planter.
– Drill the holes evenly spaced for proper drainage.
#### Step 4: Assembling the Planter
1. Lay out the planks for each side of the planter.
2. Pre-drill holes using a smaller twist bit to prevent wood splitting.
3. Assemble the sides using wood screws, ensuring each corner is square and secure.
#### Step 5: Adding Base and Supports
– Cut additional planks for the base and inner supports.
– Drill and screw these into place, making sure the drainage holes are not obstructed.
#### Step 6: Finishing Touches
– Sand the entire planter to smooth any rough edges.
– Apply a non-toxic sealer or paint to protect the wood and extend its life.
#### Step 7: Planting
– Place a layer of gravel or rocks at the bottom for extra drainage.
– Fill the planter with soil and plant your choice of plants or flowers.
#### Tips for Success:
– Wear safety gear when cutting and drilling.
– Ensure your drill bits are sharp for clean cuts.
– Consider lining the planter with landscape fabric to protect the wood and contain soil.
– Regularly check and maintain the planter to ensure its longevity.
#### Final Thoughts:
Creating a wooden planter not only adds beauty to your outdoor spaces but also offers the satisfaction of building something functional and unique. Whether you are an experienced DIYer or a beginner, this project is a delightful way to engage with nature and enhance your gardening experience. Enjoy your new, beautiful wooden planter!
Upcycled Bottle Lamps
Turn old glass bottles into stunning lamps with our innovative guide. Learn how to safely use diamond-tipped drill bits to bore holes in glass, and add a touch of elegance to your home with these upcycled beauties.

Transforming old glass bottles into elegant lamps is a creative and sustainable DIY project. This step-by-step guide will show you how to safely drill into glass using diamond-tipped drill bits and turn these bottles into stunning, functional lamps.
#### Materials and Tools Needed:
– Glass bottles (wine or liquor bottles work well)
– Diamond-tipped drill bit (usually 1/2 inch is suitable)
– Drill
– Safety goggles and gloves
– Lamp kit (including wiring, socket, and plug)
– Lampshade (optional)
– Sandpaper (fine-grit)
– Masking tape
– Protective surface (like a rubber mat)
– Water (for cooling the drill bit)
#### Step 1: Preparing the Bottle
1. Clean the bottle thoroughly, removing all labels and residue.
2. Dry the bottle completely.
#### Step 2: Safety First
– Wear safety goggles and gloves to protect yourself from glass shards.
– Work in a well-ventilated area.
#### Step 3: Marking and Taping the Drill Point
1. Mark the point where you’ll drill the hole (usually on the lower side of the bottle).
2. Place a piece of masking tape over the mark to prevent the drill bit from slipping.
#### Step 4: Drilling the Hole
1. Place the bottle on a protective surface.
2. Start drilling at a low speed and at a slight angle to make an initial indent.
3. Gradually bring the drill to a 90-degree angle as you penetrate the glass.
4. Periodically dip the drill bit in water to keep it cool and prevent glass from overheating.
#### Step 5: Smoothing the Edges
– Once the hole is drilled, use fine-grit sandpaper to smooth any sharp edges around the hole.
#### Step 6: Assembling the Lamp
1. Thread the wiring of the lamp kit through the hole.
2. Follow the lamp kit instructions to assemble the socket at the top of the bottle.
3. Ensure all connections are secure and safe.
#### Step 7: Adding the Lampshade and Bulb
– Attach the lampshade (if using) and insert an appropriate light bulb.
#### Step 8: Testing Your Lamp
– Plug in the lamp and test it to make sure it works properly.
#### Tips for Success:
– Choose a bottle with an interesting shape or color for added visual appeal.
– Take your time while drilling; rushing can cause the glass to crack.
– Ensure the lamp kit components are compatible with the size of your bottle.
– Consider using LED bulbs as they produce less heat.
#### Decorating Ideas:
– Fill the bottle with decorative items like colored stones, shells, or fairy lights for an additional aesthetic touch.
– Paint the bottle for a custom look (do this before drilling).
#### Final Thoughts:
Creating an upcycled bottle lamp not only adds a unique decorative element to your home but also contributes to sustainable living by repurposing materials. This project is a perfect blend of creativity, functionality, and environmental consciousness. Enjoy the warm glow of your new, handcrafted bottle lamp!
Customized Wall Art
Explore the art of creating your own wall pieces using various materials like wood, metal, and acrylic. Our guide provides tips on choosing the right drill bits for intricate designs, making your wall art truly one-of-a-kind.

Designing your own wall art allows you to express creativity and add a personal touch to your space. This guide will help you explore using different materials like wood, metal, and acrylic, and provide tips on selecting the appropriate drill bits for intricate designs.
#### Materials and Tools Needed:
– Materials for the art piece (wooden planks, metal sheets, acrylic panels)
– Drill and various drill bits (for wood, metal, and acrylic)
– Jigsaw or saw (for cutting materials)
– Sandpaper (various grits)
– Paints, stains, or other finishing products
– Safety gear (goggles, gloves, mask)
– Hanging hardware (hooks, nails, or mounting tape)
– Design template or stencil (optional)
#### Step 1: Conceptualizing Your Design
– Decide on a theme or style for your wall art.
– Sketch your design or use a template/stencil for more intricate patterns.
#### Step 2: Preparing Your Materials
– Cut your chosen material (wood, metal, acrylic) to the desired size and shape.
– Sand the edges and surfaces to smooth out any rough spots.
#### Step 3: Drilling and Creating Patterns
1. Mark the design on your material using a pencil.
2. Choose the right drill bit for the material:
– For wood: Brad-point or Forstner bits for clean holes.
– For metal: High-speed steel (HSS) bits or cobalt bits.
– For acrylic: Spear-point bits to prevent cracking.
3. Drill the design carefully, maintaining steady pressure and speed.
#### Step 4: Cutting and Shaping (if needed)
– Use a jigsaw or appropriate saw to cut out shapes or add details to your design.
#### Step 5: Adding Finishing Touches
– Paint, stain, or finish your artwork as desired.
– Allow it to dry completely.
#### Step 6: Assembling and Mounting
– If your design has multiple pieces, assemble them using appropriate adhesives or fasteners.
– Attach hanging hardware to the back of your artwork.
#### Step 7: Hanging Your Artwork
– Choose the perfect spot on your wall.
– Ensure the artwork is securely mounted and level.
#### Tips for Success:
– Always wear appropriate safety gear when cutting, drilling, and painting.
– Practice drilling on scrap pieces first if you’re unfamiliar with the material.
– Be patient and take your time with intricate designs to ensure precision.
#### Decorating Ideas:
– Mix materials (like wood with metal accents) for a contemporary look.
– Use backlighting to add dimension to acrylic pieces.
– Create a series of small artworks that tell a story when hung together.
#### Final Thoughts:
Customized wall art is an excellent way to infuse your personality and style into your living space. Whether you prefer minimalist designs or intricate patterns, the possibilities are endless. Enjoy the process of creating and the satisfaction of seeing your unique artwork on display!
Refurbished Furniture Makeovers
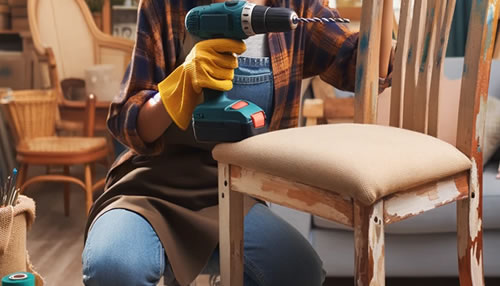
Revamp old furniture with some drill bit magic. We’ll show you how to add new hardware, decorative details, or even transform pieces into something entirely new.

Revamping old furniture can breathe new life into your space. This guide will walk you through the process of using drill bits to add new hardware, decorative details, or transform pieces into something completely new.
#### Materials and Tools Needed:
– Old furniture piece (chair, table, cabinet, etc.)
– Drill and various drill bits (spade bits, twist bits, countersink bits)
– Sandpaper (various grits) or an electric sander
– Paint or stain
– New hardware (knobs, handles, hinges)
– Wood filler (if necessary)
– Protective gear (goggles, mask, gloves)
– Decorative elements (decals, stencils, etc., optional)
– Varnish or sealer
#### Step 1: Choose Your Furniture Piece
– Select a piece of furniture that you want to refurbish. Consider its size, shape, and how it will fit into your space.
#### Step 2: Cleaning and Preparing
– Clean the furniture thoroughly.
– Remove old hardware, such as knobs or handles.
– Fill any unwanted holes with wood filler and let it dry.
#### Step 3: Sanding
– Sand the furniture to remove old paint or finish and to smooth out the surface.
– Start with a coarser grit and move to a finer grit for a smooth finish.
#### Step 4: Drilling for New Hardware
1. If you’re adding new hardware, measure and mark where you want it to go.
2. Choose a drill bit that matches the size of your new hardware’s screws.
3. Drill the holes carefully where you’ve marked.
#### Step 5: Painting or Staining
– Apply your chosen paint or stain.
– Allow it to dry completely, and apply a second coat if necessary.
#### Step 6: Adding Decorative Details
– Use stencils, decals, or hand-painted designs to add decorative elements.
– This step is optional and depends on your personal style.
#### Step 7: Attaching New Hardware
– Once the paint or stain is dry, attach the new hardware using the holes you drilled.
#### Step 8: Final Touches
– Apply a coat of varnish or sealer to protect the furniture and give it a finished look.
#### Step 9: Placement and Enjoyment
– Place the refurbished piece in its new location.
– Enjoy the fresh look and feel it brings to your space.
#### Tips for Success:
– Always wear protective gear when sanding, painting, or drilling.
– Measure twice, drill once. Accuracy is key when adding new hardware.
– Experiment with different finishes and textures to find what works best for your piece.
#### Advanced Ideas:
– Transform the piece’s purpose, e.g., turn an old dresser into a unique kitchen island.
– Mix and match styles, like modern hardware on a vintage piece, for a unique look.
#### Final Thoughts:
Refurbished furniture makeovers are not only a way to recycle and repurpose but also an opportunity to add a personal touch to your decor. Whether you’re aiming for a subtle refresh or a dramatic transformation, the key is to have fun and let your creativity shine. Enjoy your newly revamped furniture piece!
